Google Analytics 4 (GA4) collect user interaction data on your website in the form of events.
An event measures a specific interaction or occurrence on your site or app. Like, an event occurs when someone loads a page, clicks a link, completes a purchase. Or to measure system behavior, such as when an app crashes or an impression is served.
There are different types of events in GA4:
some are automatically collected (like page_view),
some are recommended events (like purchase),
and some are custom events that you define yourself to capture specific interactions.
A custom event allows you to capture and measure interactions that are unique to your site or app. With this data, you can gain valuable insights into your user behavior, preferences, and pain points. So, you can make informed decisions and optimize your website to meet the needs of your audience.
But, it is recommended that you create custom events only when that event is not collected by GA4 or present in recommended events.
In this guide, I’ll show you how to create a custom event in Google Analytics 4 using Google Tag Manager. Follow along, and I’ll cover everything you need to know to set it up.
To create a GA4 custom event, first decide what you want to track. For example, I want to track the “Buy Template” button, which redirects users to the Gumroad website to purchase my Looker Studio Template.
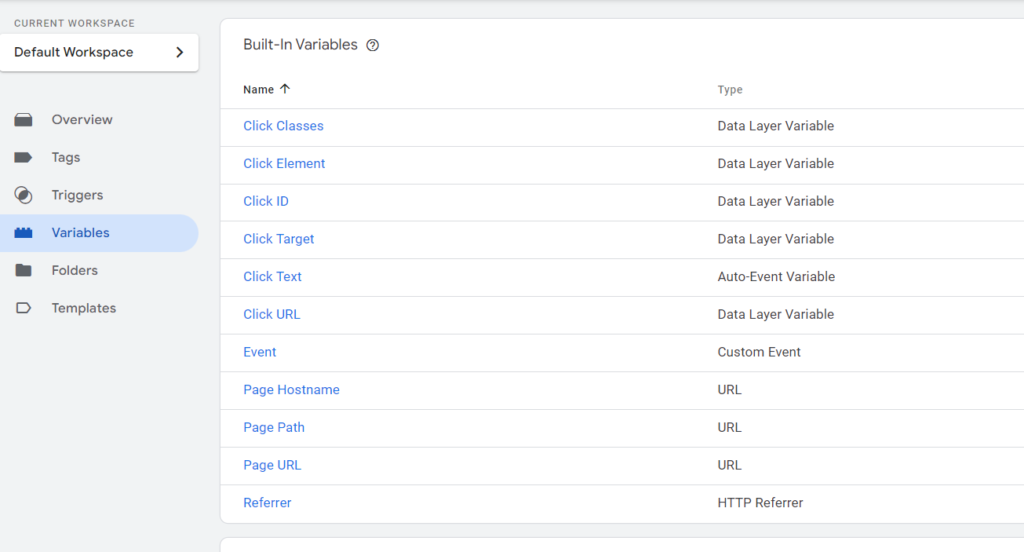
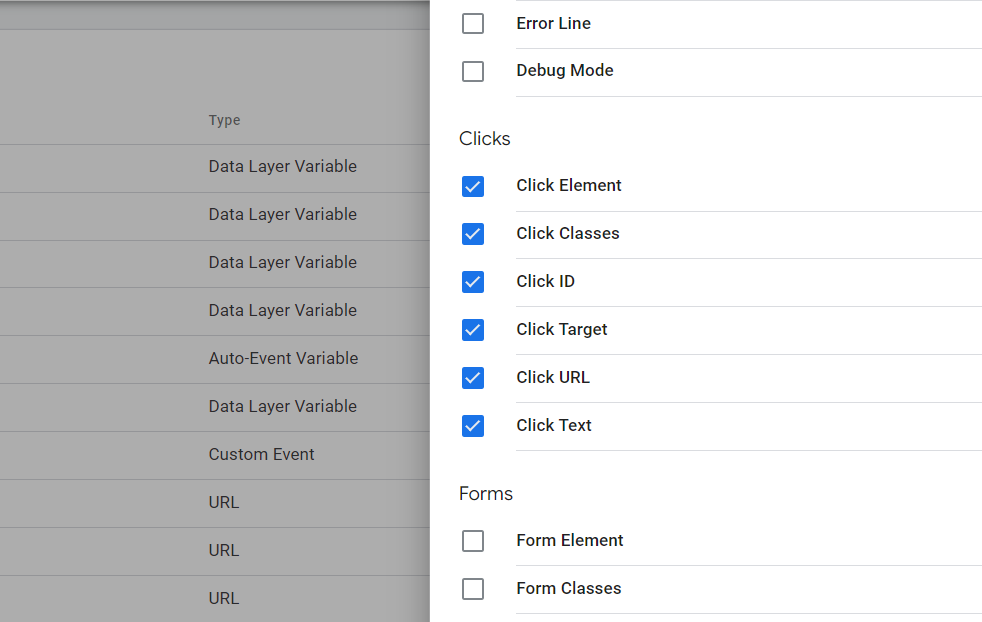
Activate Click Variables
Then, Go to Google Tag Manager. Before implementing anything, go to Variables. See if all your click variables are activated.
If not, then select Configure, and tick all click elements. It’s important to ensure your click variables are activated because Google uses these to set up a trigger.
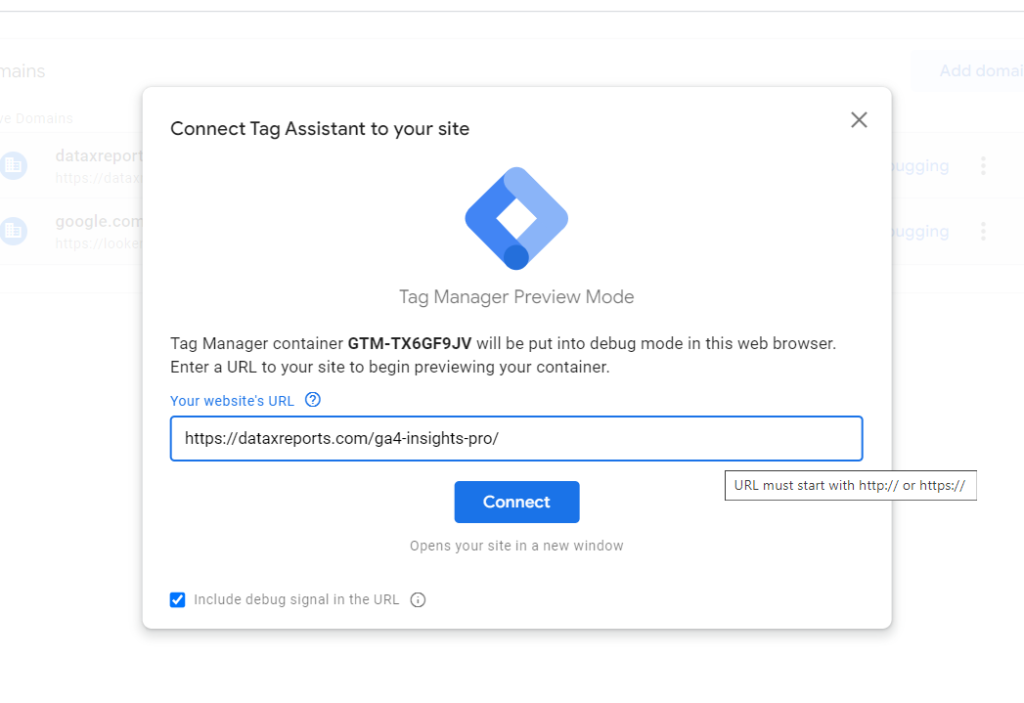
Preview and Connect
Click Preview in Google Tag Manager.
Provide the link of the page of your website where the specific interaction you want to track. And click connect.
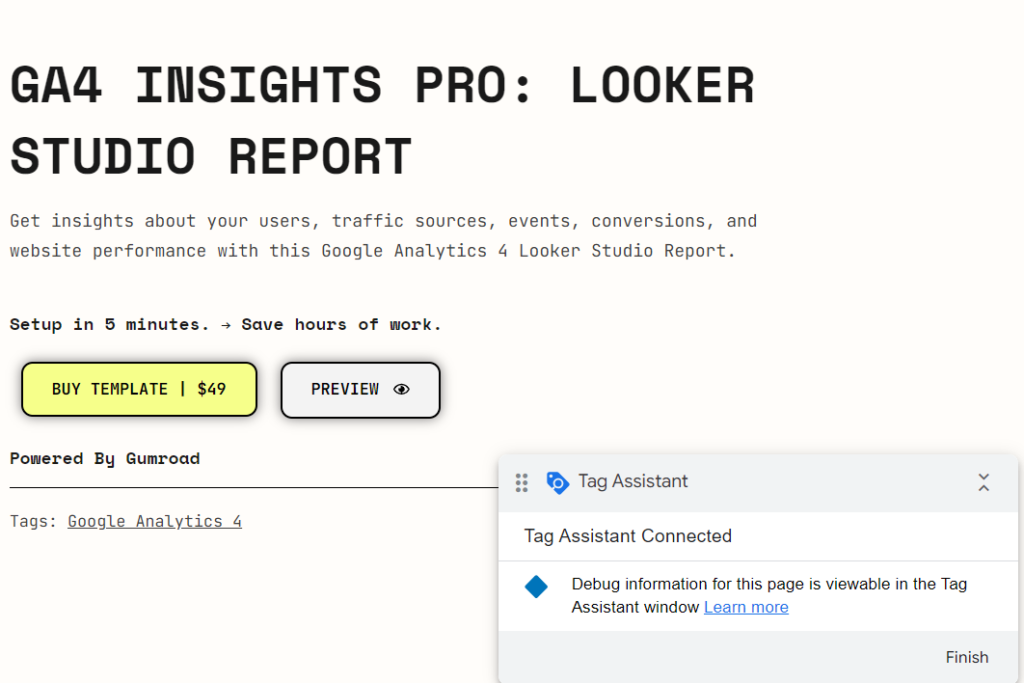
You will see Tag Assistant connected.
If you are new and haven’t connected your GA4 tag with your website using Google Tag Manager, read this blog. Here I explain how to connect your website with GA4 using the new Google Tag.
Identify the Link to Track
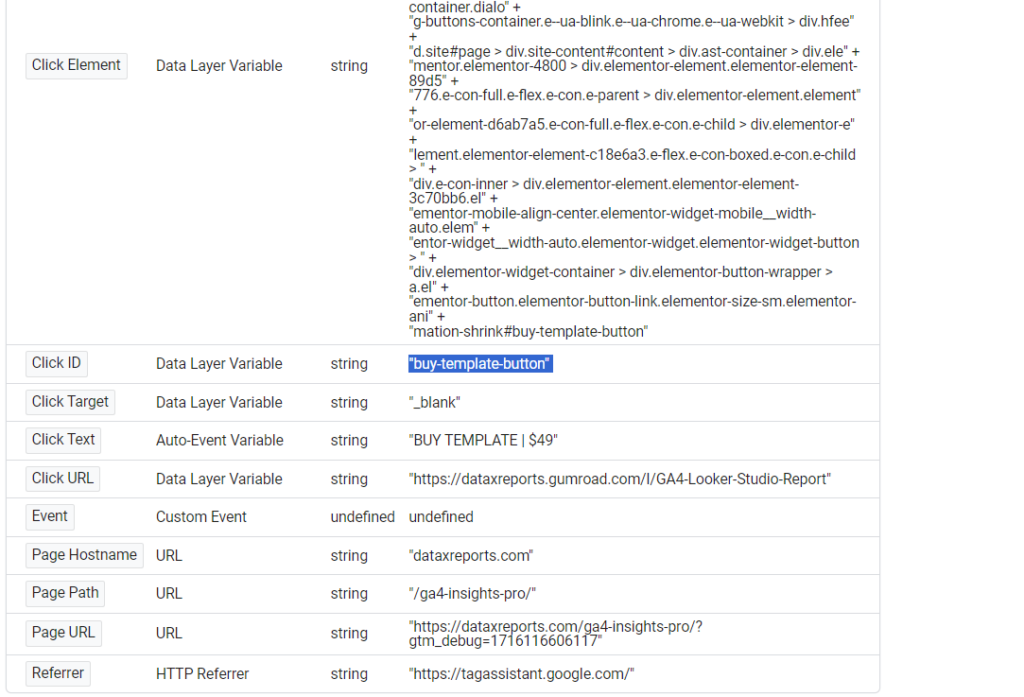
Now click on the link you want to track. In my case, it’s the “Buy Template” button.
Go to Tag Assistant, click on Link Click on the left-hand side of the page, and then click Variables.
Select the variable “Click ID” because it’s a unique identifier. Copy the value of Click ID.
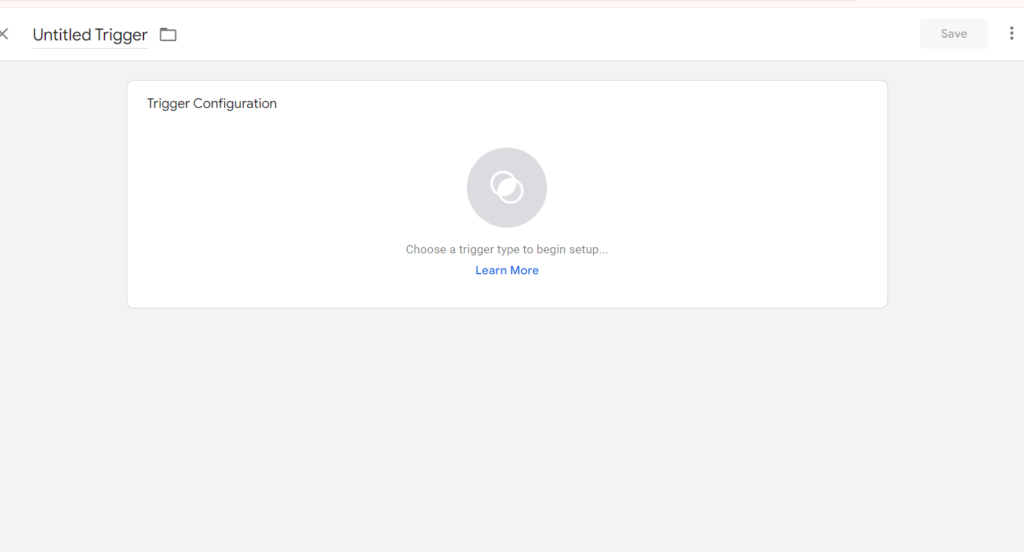
Create a New Trigger
Go back to Google Tag Manager and click Triggers. Click New, then Trigger Configuration.
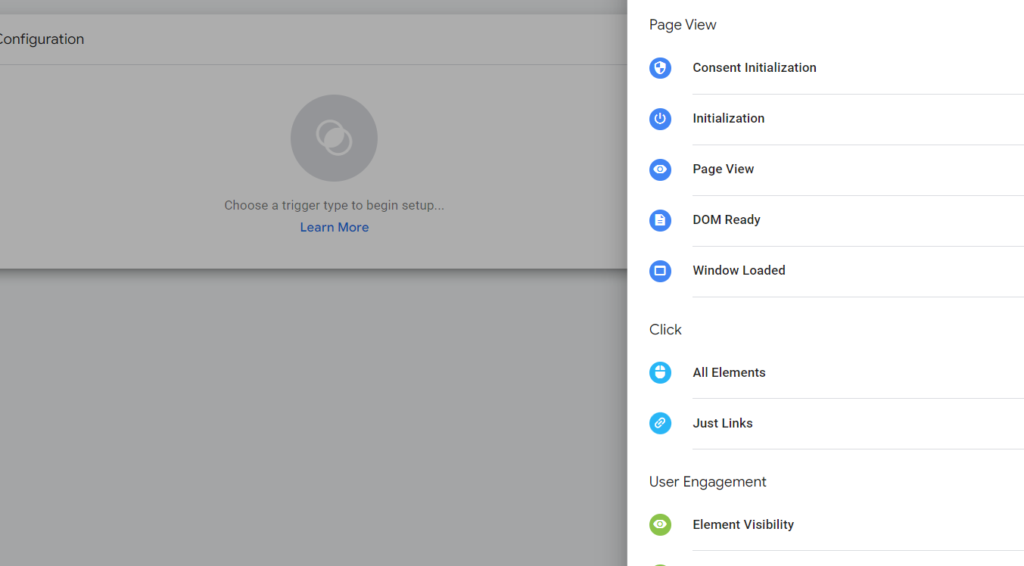
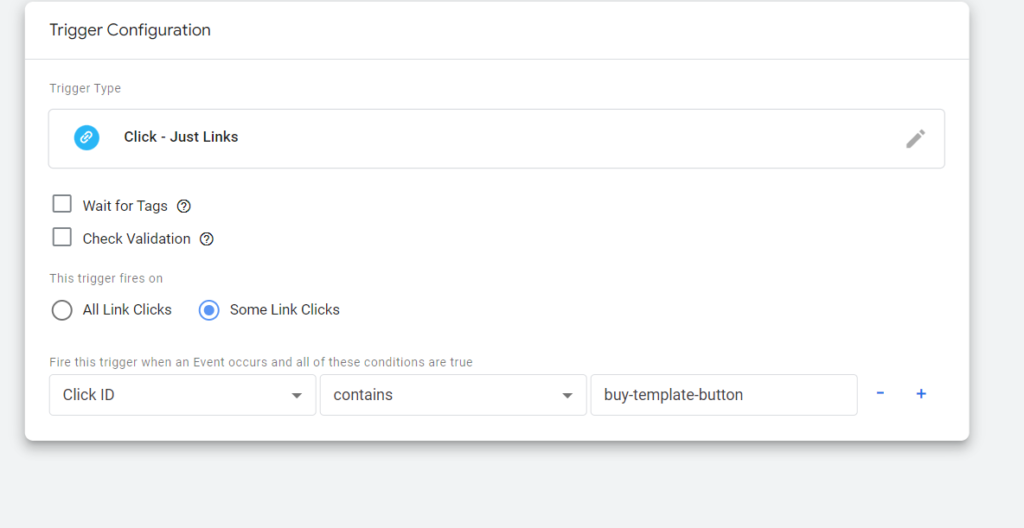
Select Just Links, and choose Some Link Clicks because we want to track a specific link.
Under Click ID contains, paste the Click ID value (“buy-template-button” in my case). Name your trigger like “GA4 Buy Template Link” and save it.
Creating the Tag
Now, we need to create a tag. Go to Tags and click New.
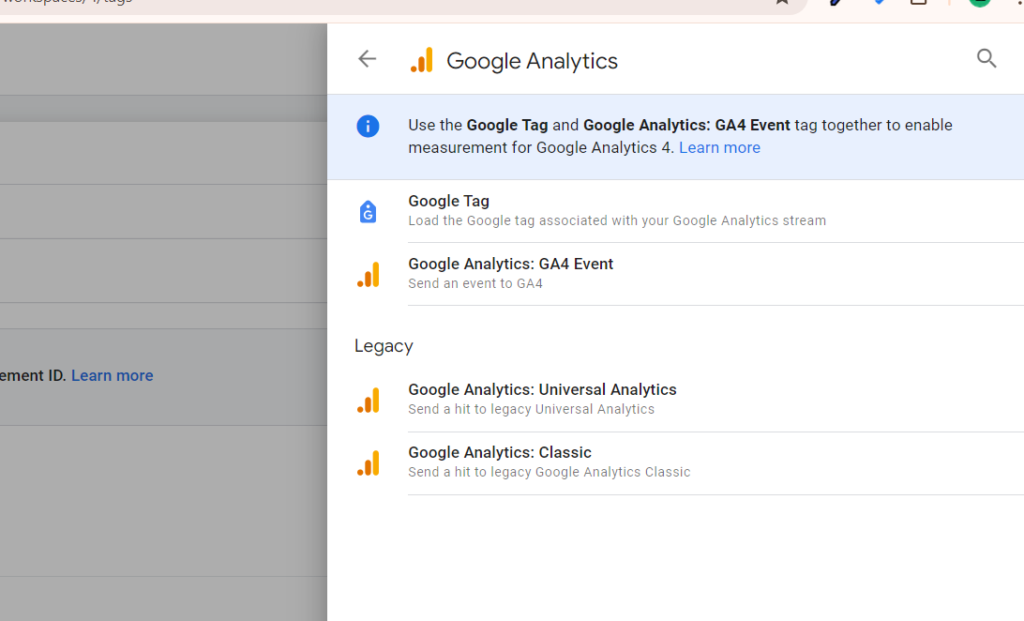
Click on Tag Configuration, then Google Analytics, Google Analytics: GA4 Event.
Name the Event and Add Parameters
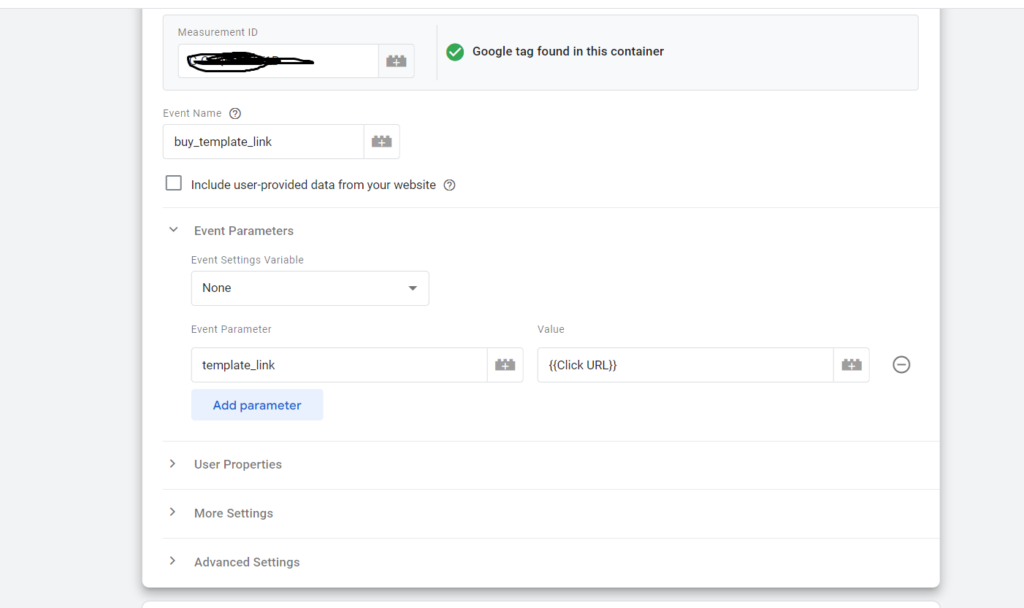
Add your GA4 measurement ID. Give a name to your event like buy_template_link.
If you want to send additional information with your tag, select parameter.
Choose a name for your parameter like template_link, and select a value. I select Click URL as the value to identify the link with the specific template.
Now, when a user clicks on the button with the specific template, this parameter will be sent.
You can also use User Properties, but I’ll skip it because I don’t have any additional user data to track.
Link the Trigger to the Tag
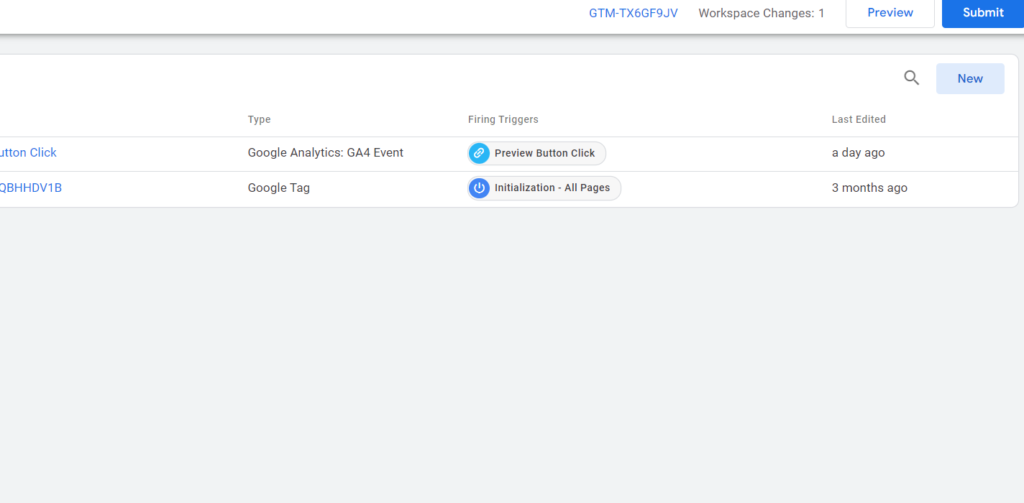
Go to Triggering and find the trigger we created. Provide a proper name to the tag, such as “GA4 Buy Template Link Click”, and click Save.
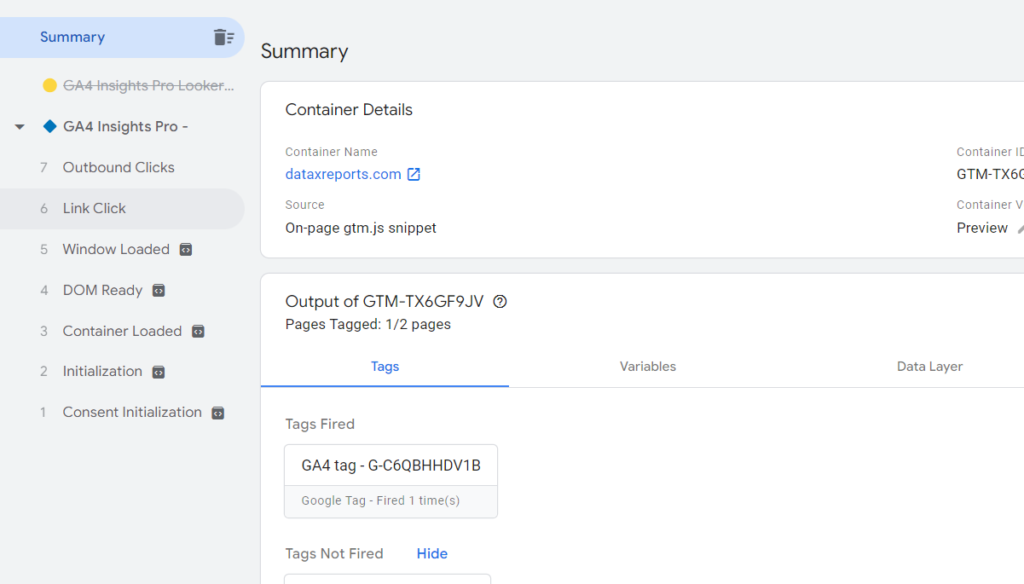
Testing Your Tag
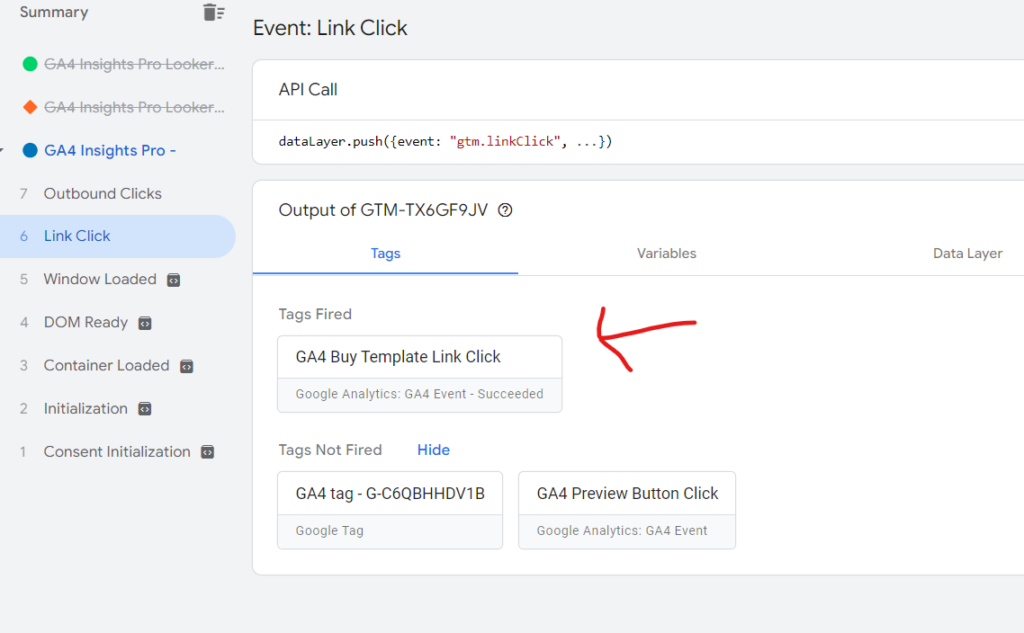
The important part is testing our tag. Click Preview and enter the webpage link again.
It will open your webpage to test. Now click on the tagged element like Buy Template button in my case.
Go to Tag Assistant, click on Link Click, and you should see our tag fired: GA4 Buy Template Link Click.
Verify in GA4
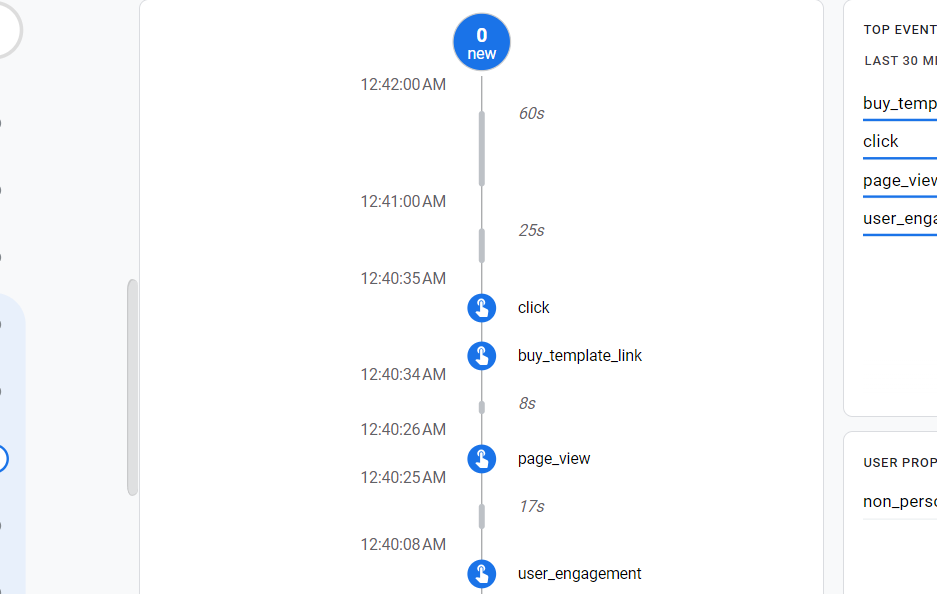
Now, you can also verify your tag in Google Analytics 4.
Go to GA4 > Admin > Debug View. Here, you can see the timeline of events. Look for your tag name like buy_template_link. If you see it, your tracking is working correctly.
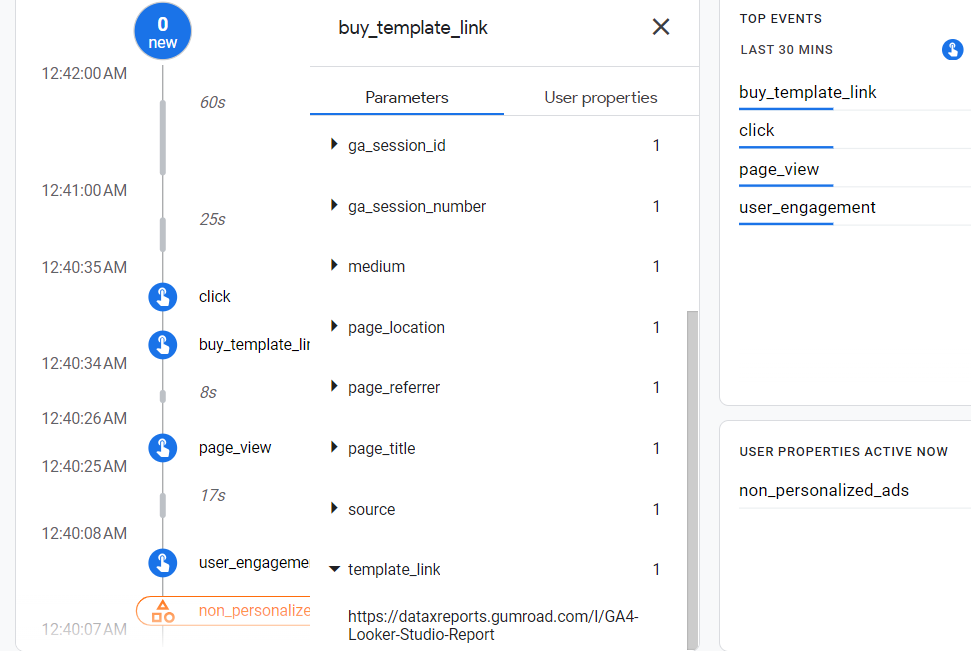
Click on the buy_template_link event for more detail. Select Parameters and search for your parameter name which you set in Tag Manager like template_link. You can see the parameter that I am sending with my event.
Now, to see this parameter in your report, you need to register it as a custom dimension, otherwise, it won’t be visible.
Register the Parameter in GA4
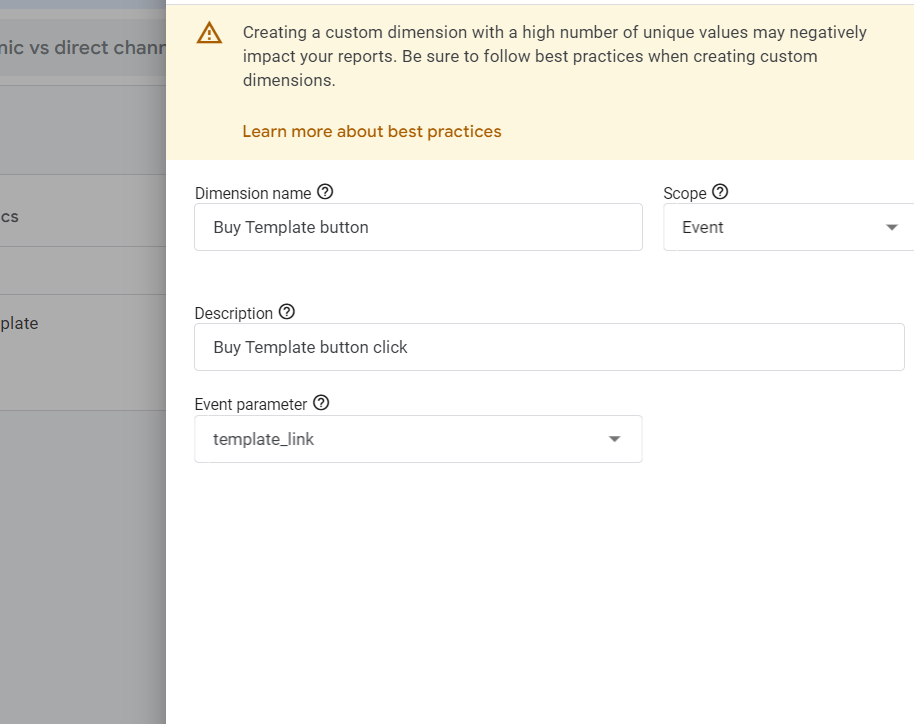
Go to Admin in GA4. Click on Custom Definitions > Create Custom dimensions.
Add a New Custom Dimension. Provide a dimension name and ensure the scope is set to Event. Add a description.
For Event Parameter, it should be exactly the same as the parameter in Tag Manager.
Go to Tag Manager, copy the parameter name, go to Google Analytics, and paste it here. It might take 24 hours to see the event in your report.
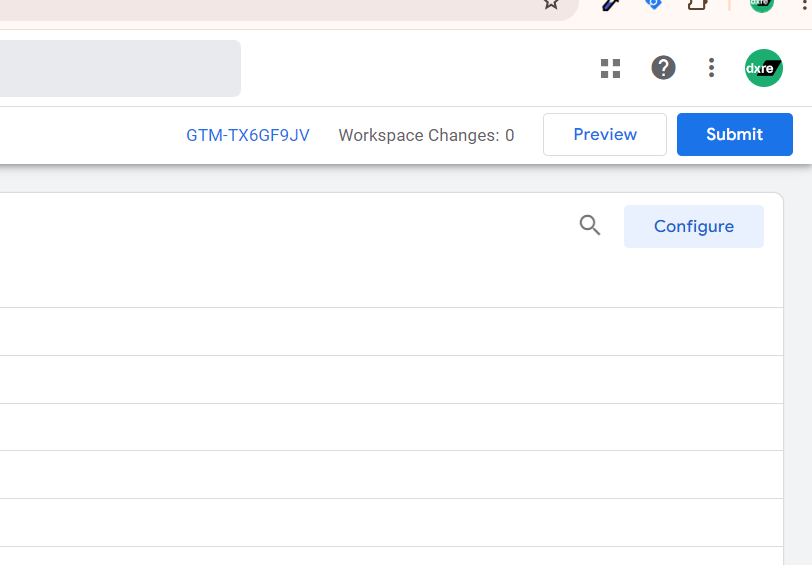
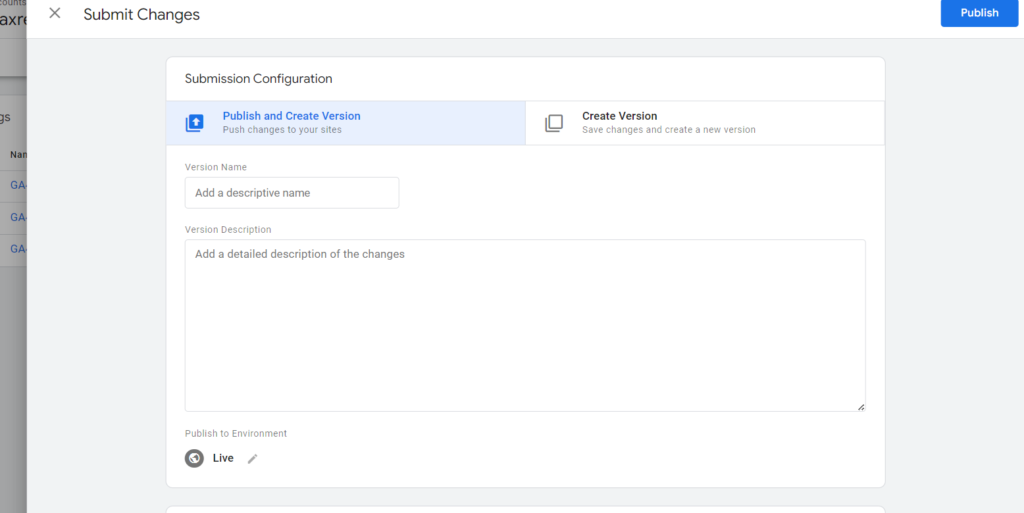
Final Step: Publish your Container
Lastly, it’s super important to publish your container. Go to Google Tag Manager and submit the changes as a new version.
Conclusion
By following these steps, you’ll successfully track custom events using Google Analytics 4. This allows you to gain deeper insights into user interactions on your website or app, enabling you to make data-driven decisions.